What's new
Carbonite

South Africa's Top Online Tech Classifieds!
Register a free account today to become a member! (No Under 18's)
Home of C.U.D.

Indestructible - Scratch Build

ParkingCheezy

Senior Member
Rating - 100%
13   0   0
Joined
Aug 25, 2014
Messages
44
Reaction score
12
Points
2,985
Location
Mtubatuba
Indestructible
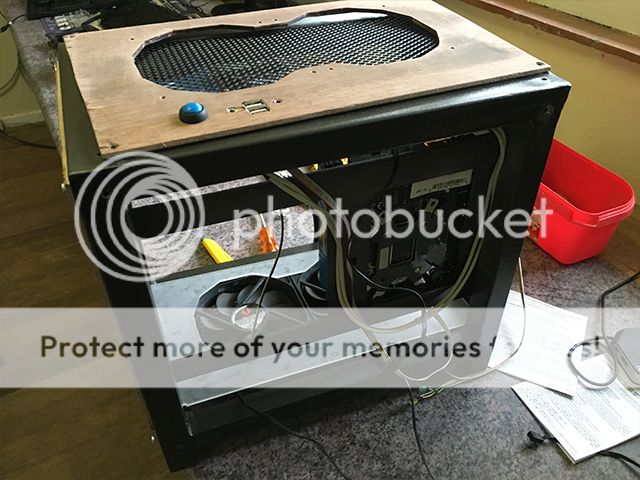
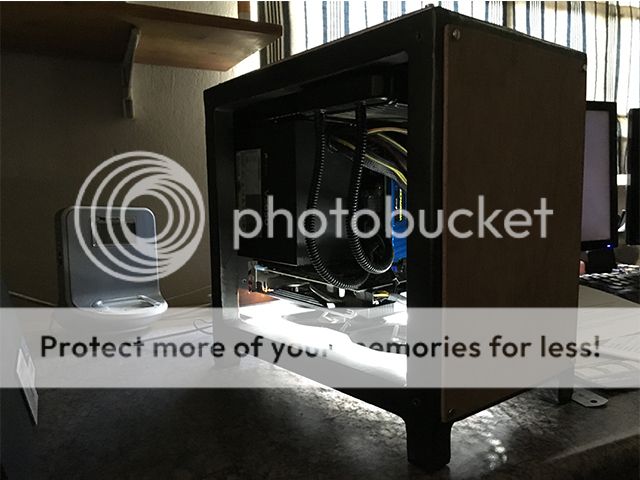
Industrially Styled Scratch Build


So after a couple designs this is what I settled on for my new ITX case that i am going to build from scratch.

I aim to make a case that is about as small as I can make it without sacrificing too many luxuries. I also want my graphics card to run cooler than it does in my Prodigy and so it needs a steady supply of fresh air.

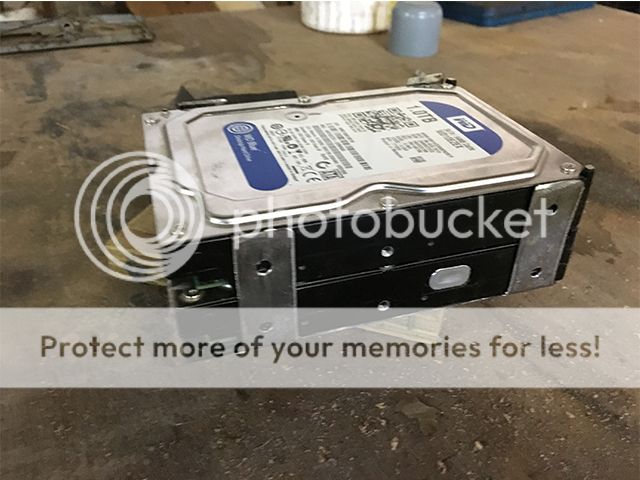
So this is the basic outline of what I have decided on building. 2 fans in the top with my 120mm radiator and two in the bottom, the PSU is right above the motherboard as I have a AIO water cooler and so space is not a necessity. I have some lengths of 1 inch square steel tubing that I have salvaged from an old art piece, I am going to use these to create the frame of my case.

View attachment 49565
 
Part 1 - The Frame

So I started by welding a frame and then re-welding due to the fact that the cooling of the welds pulled it out of being square. I also ground down the welds to be smooth. This frame is so over engineered it's pretty ridiculous and is why I called the thread "Indestructible".
View attachment 49578
Adding the motherboard supports, which are just made of 2 lengths of flat bar.
View attachment 49577
Cut out the basic panels (Will show these when they are eventually looking like something) and drilled out the mounting points for the panels to come.
View attachment 49576
I then dug around for the thread cutting kit and cut a thread for the 4mm bolts to come.
View attachment 49575

Hopefully I can get the mesh for the fans tomorrow and sort out the rear bezel!
 
Nice dude, liking the sketchup work. what you doing for the sides just clear perspex ?
 
Nice dude, liking the sketchup work. what you doing for the sides just clear perspex ?

Thanks man!
Not as clean and professional looking as yours but I try. At the moment I'm going to try use marine ply chipboard (experiment) but if it doesn't workout perspex is my back up plan.
 
Part 2 - The Rear Bezel

This is a bit tricky as it has to line up with your motherboard mounts so I mocked up the mother board and got a layout from a sketchup model (of a HAF I think), all I had to do was add the PSU mounts and print it out!


It is made out of the steel side panel taken from an old case.
To cut out the exact shapes of the bezel I used a bit of spray on contact adhesive to make sure it didn't move and hacked away with an angle grinder and the dremel for finer pieces.


Here it is with a layer or two of paint.

And that's all I finished today, we will see what tomorrow holds!
 
dude that looks sick, really really nicely done.

I'm working on you sketchup now. got a cool idea.
 
Part 3 - Fan Grill

So this is some of the smallest mesh I could easily get, Here it is cut to size.


It was pretty rusted up though so that had to be dealt with.
Here it is having a bath!


A quick wire brush later and its clean! I am going to bolt my fans directly onto the mesh as the holes in the mesh are the right size


They need a panel to go over them though so I cut one out quick.


All cut out

[MENTION=33673]Not_Sean[/MENTION] Suggested that I have a strip of Perspex around the bottom of the case with lights to highlight the SSD and graphics card which I thought was insane and then I realized I needed a thicker perspex to do it and also the join was going to be a little challenge in itself. So i'm going to do it but at later stage, probably in the next holidays.
So I decided to have a sanded perspex fan cover on the "Floor" of the case and a full size window on the far side.
 
So today I noticed that I hadn't uploaded the rest of the build. Definitely my bad.:eek: So here it goes

Part 4 - Side Paneling and IO

The First step was to cut out the panels from a sheet of marine ply and since my frame was not 100 percent square a bit of sanding and trimming was required to get the perfect shape. From here I drilled holes in the corners of the wood for mounting to the case. I also found these plastic end caps in the hardware store in town that fit perfectly into my case's feet!


At this stage I also needed a power button and USB ports. I salvaged this chip off of an old case that the PC shop in town didn't want.
This is me test fitting a mounting system.


And here it is from above!
Photo%202016-06-22%2012%2001%2025%20PM_zpswuluoosm.jpg


So this is where this post ends. Does anyone know how to rotate this photo? I ask because on Photobucket it is vertical, is there something I'm ignoring.:confused:
Photo%202016-06-22%205%2047%2010%20PM_zpsar0exh9r.jpg
 
Part 5 - HDD Cage and Light Diffusing Perspex

I needed to mount my hard drives to the back of my front panel. So I bent a bit of stainless steel into a holder and lined the inside with a thin foam/rubber mat we have for "cushioning" hard things such as an electric gokart's seat my friends and I made. The reason for this was to absorb HDD vibrations and so reduce the sound they make, seeing as though they are attached to a nice wooden panel to amplify their noise. Yes they are close together but the bottom drive hardly needs to spin as it only has series on it. I also tested it after it was all in my system and it ran at 46 degrees when being used so It should be fine.
HDD%20Done_zpsfhpyjn01.jpg


@Not_Sean Suggested the idea to under glow effect that I have tired to create here. I do realize more pictures of the sanded perspex would be ideal, however I have simply lost them.:confused:
Here you can see where the motherboard sits, I didn't bother to go in depth there because its just the standoffs from the salvaged case epoxied to the frame of the case and painted. The next job was to put the LED strips in around underneath the prespex and wire them into a hidden switch and then the PSU.

Photo%202016-06-23%209%2002%2021%20AM_zpsayur3lpt.jpg


At this point all that needed to happen was to sort out minor things and finish it off!:cool:
 
Final Pics
Open%20Side_zpsxeybknir.jpg


Done_zpsgkhktpr9.jpg


Done%20rear_zpsbx4dojuu.jpg


I will look for some more glamorous shots of it because these aren't that great.
But it runs very quietly when compared to my Bitfenix prodigy, and runs at cooler temps believe it or not as the graphics card gets very good airflow and the CPU runs at the same temps as before.
All in all I learnt a lot from this and would recommend rather just going out and doing whatever you have been debating on the forum. Don't get me wrong planning is essential, but there are always going to be things that you couldn't plan for.

Thanks for checking it Out!
 
Looks great man, now just a touch of paint to make that beauty complete. Nice job so far

Sent from my Redmi Note 2 using Tapatalk
 
Looks very nice bud, I love unique builds, it's nice to know that you're the only guy in the world with a build like yours, anyone can slap some led's in a standard case and call it custom. Well done :D
 
[MENTION=22979]abs1[/MENTION] You think so? What color/s would you do?
[MENTION=34466]Ravin'[/MENTION] Thanks man!
 
[MENTION=22979]abs1[/MENTION] You think so? What color/s would you do?
[MENTION=34466]Ravin'[/MENTION] Thanks man!

Colour is a bit subjective, what appeals to me you might despise, anyway the hardboard looks a touch unfinished so a nice sand down, primer and white paint will looks awesome. I might also lose the cheese head screws for anodised black hex nuts or even chrome capped just to look a bit different. just my 2c, have fun :)
 

Users who are viewing this thread

Latest posts

Back
Top Bottom